|
Items
needed:
-
Floor jack
- Jack
stands and wheel stops
-
17 mm wrench
-
14 mm wrench
-
10 mm wrench
-
Impact wrench if you’ve got it
- 13
mm (for muffler removal, if needed)
Rear:
1.
Jack up the rear of the car (I used the rear differential
housing as my jack point). Place jack stands. Be sure to use
the wheel stops on the front tires, just as an added safety
measure.
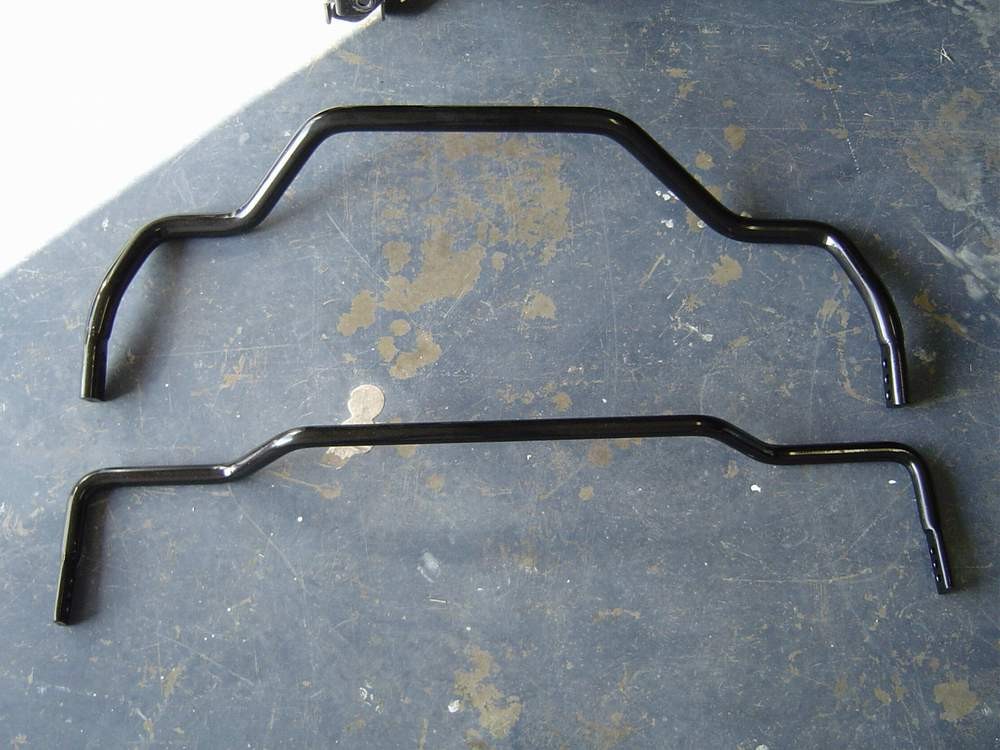
2. There are four bolts holding the rubber bushings on the
sway bar in place. Remove all four on each side.
3. There is a connecting rod on the end of the sway bar that
connects to the suspension. Remove the bolt that is connected
directly to the sway bar on each side.
4. Watch your head because once that last bolt is out, the
sway bar is going to drop down onto your exhaust pipe. It
takes some maneuvering to get the sway bar over the exhaust
in order to remove it, so to make it easier; I unhooked my
muffler from the rear hangers so I could pull the pipes down
a bit.
5. Install new sway bar. Select your settings if it’s
adjustable, and bolt the ends back into the connecting rods
that are hanging down. Remember, the rear sway should hang
on top of the exhaust pipes.
6. Install the new bushings and bolt back into place. If they’re
not rubber (and that’s a good thing—my stock rubber
bushings were pretty torn up after 9500 miles) you’ll
need some lubricant to slide them back into place.
7.
Go back and make sure all your bolts are torqued down tightly.
Once that’s done, let the car down, and get ready to
do the front.
Front:
1.
Move the wheel stops to the back tires (safety first), then
jack up one side of the car. Securely place your first jack
stand, and then repeat on the other side. You need to make
sure you can easily get underneath the car on both sides.
2. Remove the plastic diffuser piece. There are approximately
3 bolts on the back on it (located near your cats) and 10
bolts right behind your front chin guard. There’s also
one plastic “rivet” style bolt in the center.
That’s most easily removed with a flat head screwdriver.
3. Once that’s all set aside, there is another plastic
piece on the passenger side of the car that’s held up
by three more of the plastic rivet style bolts. You’ll
have to remove that to get to the end of the sway bar.
4. Remove four bolts on each side—just like the ones
you did in the rear, that hold together the bushings.
5. Remove bolts located at the TOP of the
connecting rod on the end of the sways. Use caution; once
again, as soon as the second bolt is removed the sway bar
will fall to the ground.
6. Remove the rods from the stock sway and replace them in
the exact same position (unless you bought the EVOs—those
required some “modifications” to the rods), and
don’t forget to select your settings if the front sway
is adjustable.
7. Replace now sway bar where connecting rods where originally
located.
8. Replace bushings and bushing brace back to original spots.
9. Tighten all the bolts you removed and replaced, to make
sure nothing is loose.
10. Replace plastic diffuser.
11. Jack car back up to remove jack stands, then slowly lower
it back down.
12.
Take a test drive to make sure everything is set. If your
sways came with anything other than rubber bushings (be happy!),
they will creak a little as you drive. That’s perfectly
normal because they won’t have as much give as the stock
rubber bushings did. If it’s something that bothers
you, you can use a little graphite to rub over the bushings
to quiet them down.
|