| Items
needed:
-
Floor jack
- Jack
stands
-
Needle nose pliers
-
Torque wrench (and an impact if you’ve got it)
-
10 mm wrench
-
Other assorted wrench and socket sizes
-
Large screw driver (to use as a crowbar)
-
WD-40
Front:
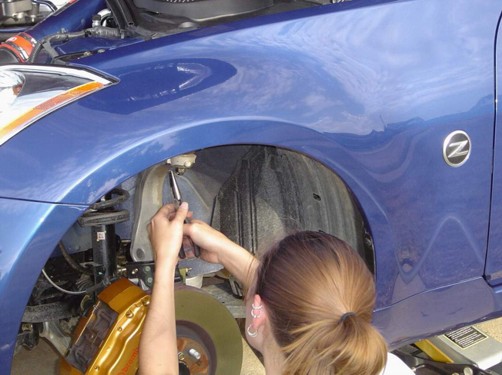
1.
Remove front strut bar. There are four bolts on each side,
and guided on by a bolt that comes up through the engine bay.
2. Jack up car in front and place jack stands underneath for
support.
3. Remove first front tire (and it’s a good time to
clean those calipers and inside of your wheel as well).
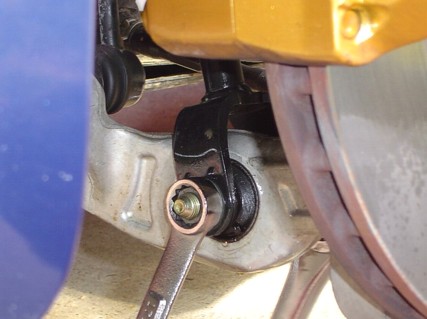
4. Unbolt the front sway bar end link.
5. Remove the cotter pin from the upper A arm (it’s
a small piece of metal that’s strung through like a
piece of thread—be careful, it will break easily).
6. Unbolt the upper A arm.
7. Remove the four bolts to the shock/spring where the strut
bar was bolted down.
8. Remove bolt from the bottom of the front suspension shock
(watch out, it’s torqued down TIGHT, so use some WD40
to help loosen it up).
9. Remove the two rubber lines from the shock and move out
of the way. Also remove the bolt from step 8 at this time.
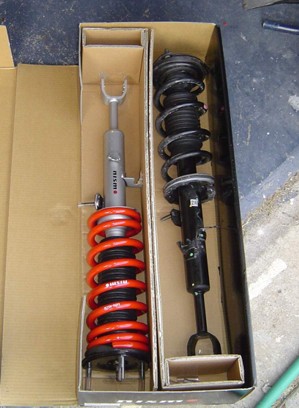
10. Replace with the new set up in the reverse order. Pull
the brake set up down as you work the new set up into place,
and also be sure that the rubber lines are in the correct
place or else they will not pop back in to the new set up.
11. Repeat the process for the other front side.
12. Replace front strut bar once both new spring/shocks are
on, the car has been lowered back down, and it's even.
Rear:
1.
Jack up car and remove rear wheel.
2. Use your Z’s jack to place under the rear spring
seat, and jack it up to put slight tension on the seat.
3. Remove the bolt to spring seat to lower the rear control
arm.
4. Slowly lower the jack. This is where the big screw driver
comes into play. You may need it to pry the bushing from the
lower control arm.
5. Remove the old spring and install the new one, using the
Z jack to lift the spring seat back up and replace the bolt.
6. Remove the lower shock bolt from the control arm.
7. Remove the two bolts from the top of the wheel well.
8. Remove the stock shock, and take the top bolt and dust
shield from the shock and add it to the new shock.
9. Install new shock.
10. Put everything back on, replace the wheel, lower the car,
and check to make sure you’ve got equal spacing between
front tires and wheel well, and then the rear. After that,
take her for a test drive and she how well she corners! |