You
will need:
-
Flathead Screwdriver
-
Phillipshead Screwdriver
-
10 MM Socket wrench (and extension if you've got it)
-
A friend to hold air filter in place for you
1.
Remove all plastic fasteners on the top of the front bumper
and all the metal fasteners underneath which hold the brush
guard (and the front diffuser if you've got the Track) to
the bumper. You don't need to actually remove the bumper,
you just need to be able to get your hands in there in front
of the radiator to install the air filter.
2.
Disconnect the negative battery terminal.
3.
Remove the Mass Air Meter from the stock intake piping with
a screwdriver. Make sure to set this aside on top of the engine
cover where it won't get pulled down underneath something.
4.
Begin to disassemble stock intake. I started by removing the
air filter, the the air box (which takes a little prying because
of it's position), and I worked my way up to the throttle
body.
5.
Install heat shield on exhaust manifold. This is where the
socket wrench extension will help out a lot!
6.
Prep the thinnest/shortest piece of hose by placing the smaller
clamps on either side. Slide it onto the throttle body half
way and tighten the top clamp.
7.
Remove the nut on the intake manifold, just above the strut
bar.
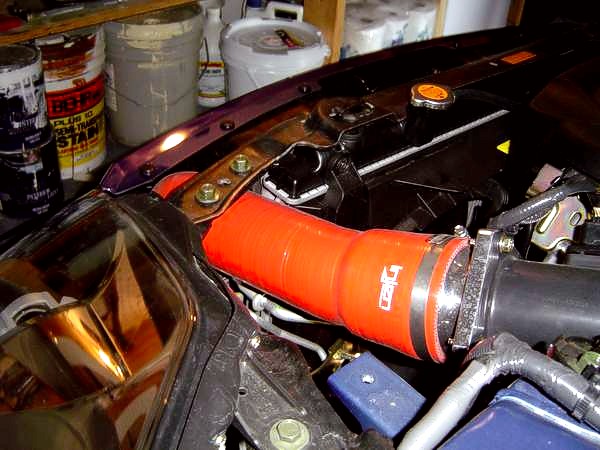
8.
Insert the long and angled metal tube into the hose and place
it's extension/"arm" onto the bolt you just removed
the nut from. Make sure you've got everything lined up the
way you want it and then replace the nut to it's original
position.
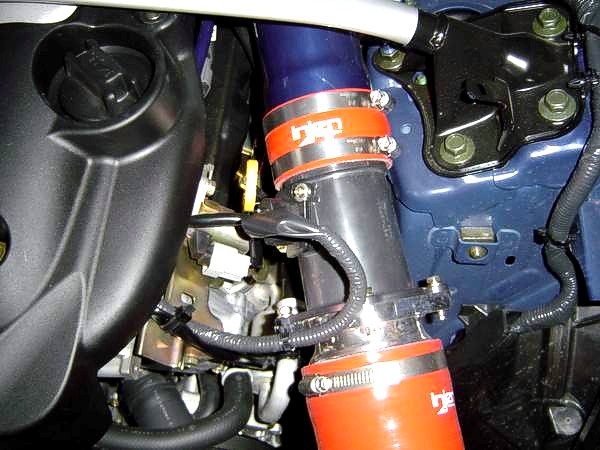
9.
Prep the second shortest piece of hose with the two larger
clamps, and then fit it halfway on the metal piping. Tighten
the top clamp.
10.
Insert the black plastic piece for the Mass Air Meter into
the remaining half of the hose. Position it so that the Mass
Air Meter fits in with enough slack in its wires. Make sure
the metal end is facing towards the front of the car.
11.
Prep the large hose with the appropriate clamps.
12.
Insert large hose through the hole left behind by the stock
air box. It will take a little forcing, but it does fit (snuggly)
without any modifications.
13.
Fit hose around MAF and tighten the clamp.
14.
Connect air filter to the remaining metal tubing and secure
the clamp.
15.
(This is where your friend can help a TON!) Get underneath
the car, pull down the front diffuser (if applicable) and
insert the metal piping into the hose. Position filter to
desired place. And as the filter is held in place, reach through
the top opening by the hood lock and tighten the final clamp
securely.
16.
Reinsert the Mass Air Meter and tighten the screws.
17.
Replace all the fasteners for the front bumper (and don't
forget to put the brush guard back on like I did the first
time! lol).
18.
Reconnect the battery and you should be good to go.
It
took me and hubby about an hour and a half from start to finish
and I also had him look over this write up to make sure I
didn't forget anything, but hey, it's been a while since we
did this.
You
will need to reset everything inside your car--radio stations,
clock, etc. since the battery was disconnected, but since
you had it disconnected during the install, the ECU should
adjust itself properly for the new intake with no problems.
[originally
posted by Christi on My350Z.com]
Back
to The Garage |