How
to Install
ATI ProCharger (supercharger)
on a 350Z ('03 or '04)
Preparation
Phase
Pages
6 & 7:
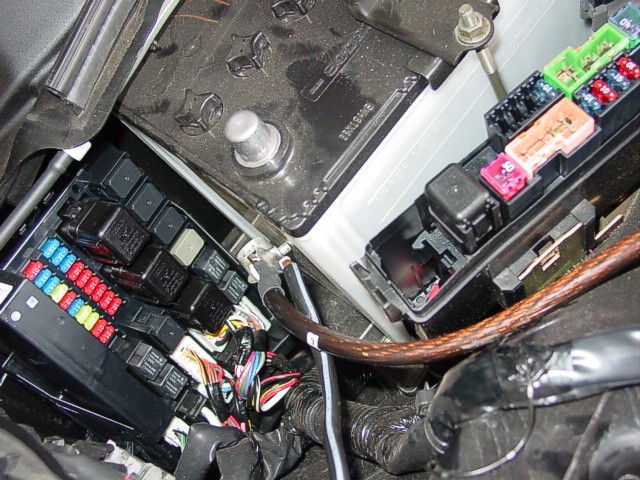
None of the photos actually show the passenger side windshield
cowl removed. When you initially look at it, you will see
the fusebox in front of the battery. With the windshield
cowl removed you will see the second fusebox mounted on
the firewall, pull the cover up to remove. The fuel pump
fuse is the lowest red one on the left side. See Photo 1.
Remember there will still be some fuel in the line when
you get to the fuel pump installation step—watch out.
Page
8, Step 12: No need to remove the two "air
box" bolts shown, they don't attach to the airbox.
Page
8, Illustration B6: The brace cannot be removed
until after you remove the front fascia on Page 12, Step
21.
Page
10, Step 17: Also remove the front fender faring
bolts. The fairings extend up to the front fascia on both
sides of the lower engine cowl.
Page
12, Step 22: Set the brace aside, do not reinstall,
because you cannot install the air intake with the brace
in place.
Page
14, Step 26: Double-check that you've removed all
battery cables before you do this step. You don't want to
deploy the airbags!
Page
20: We're not sure, but there may be a check valve
in the power steering cooler. To be on the safe side note
which line goes where, and install the new lines to the
same locations.
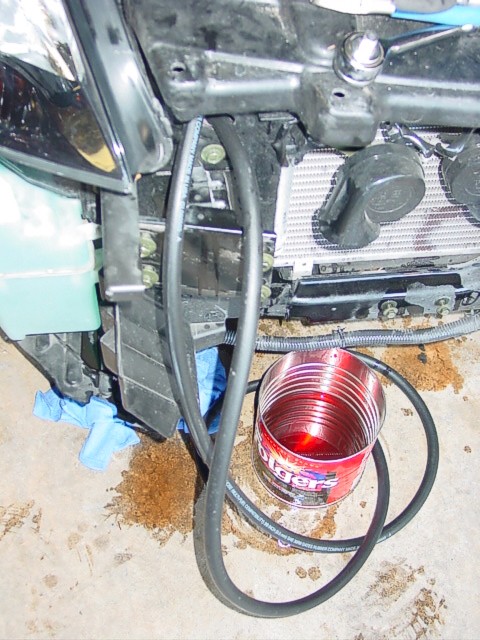
Page
22, Step 37: Instead of using ATI's power steering
cooler bracket installation method, it was far simpler to
run self-taping screws in with a power driver. Note the
cooler is attached to the bracket with zip ties. You may
have to trim the length of the hoses so you don't have too
much slack. Secure the hoses with zip ties.
Page
22, Step 38: You can't do this step now because
the battery is disconnected, you've got the fuel pump fuse
removed, and no serpentine belt installed. Annotate this
step on page 55 or 56.
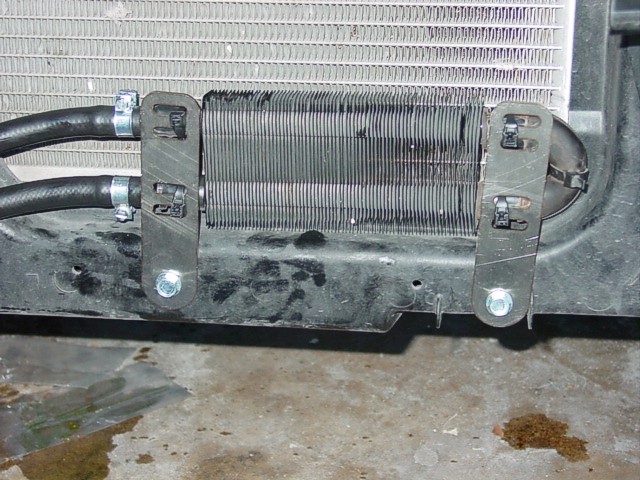
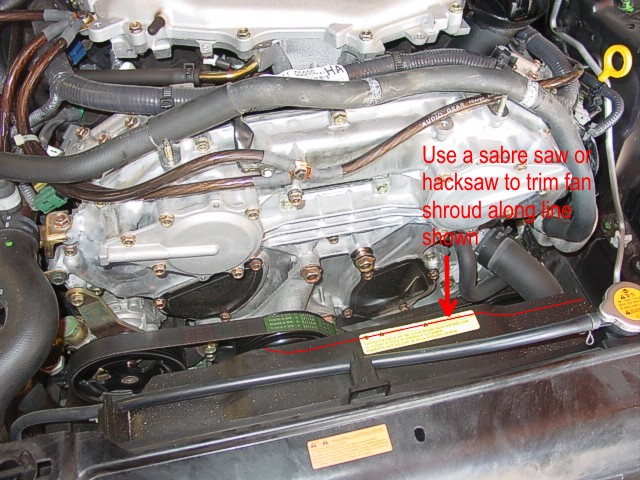
Page
22, Add new step (it's Step
2 on Page 24): Trim the radiator shroud
now while you have best access. Recommend trimming about
a half-inch along the line shown in the photo at right.